0

Out of 0 Ratings

Owner's of the Bushnell Telescope VOYAGER gave it a score of 0 out of 5. Here's how the scores stacked up:
  • Reliability

    0 out of 5
  • Durability

    0 out of 5
  • Maintenance

    0 out of 5
  • Performance

    0 out of 5
  • Ease of Use

    0 out of 5
Page 8
of 76
 
7
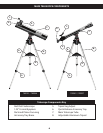
No tools are required for assembly of your telescope.
Remove all components from the carton and identify all parts It is a good idea to lay all the parts out in front
of you before assembly. Since your telescope is a precision optical system, the components require careful
handling—particularly the Sky Tour Handset, Telescope, Eyepieces and various accessories.
Set Up Tripod and Accessory Tray
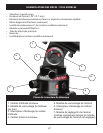
Stand the Voyager Illuminated Mount Assembly with pre-attached tripod legs on a level surface. Spread 1.
the tripod legs to their fullest position.
Fold down the accessory tray braces and place the Quick Release Accessory Tray on top of the braces.2.
Insert accessory tray bolt through the center of the accessory tray braces and tighten accessory tray bolt 3.
into the accessory tray brace.
Adjust the tripod height to suit by loosening the tripod leg adjustment bolts and extending the tripod 4.
legs to the desired height. Tighten the tripod leg adjustment bolts.
Attach Telescope Tube
Locate Main Telescope Tube.1.
Remove the two telescope tube bolt nuts from the bolts extending from the under side of the telescope 2.
tube.
Position main telescope tube with the attachment bolts facing down through the two holes in the 3.
illuminated telescope mount top.
Reattach the telescope tube bolt nuts and tighten.4.
Attach Final Telescope Accessories
Locate Red Dot Finderscope1.
Place finderscope over the corresponding attachment lug on the top of the telescope tube near the 2.
focusing mechanism.
Slide forward until the finderscope is seated securely. The large end of the finderscope should face the 3.
open end of the telescope tube.
Attach low power eyepiece.4.
For Reflector Telescopes, insert eyepiece directly into the focusing tube mechanism.•
For Refractor Telescopes, insert eyepiece into the diagonal mirror, then insert the diagonal mirror into •
the focusing tube mechanism.
Tighten all set screws to secure accessories.5.
LENS ACCESSORIES
Barlow Lens (Select Models)
Some Voyager with Sky Tour units come with a Barlow lens. This accessory will allow you to now have dual
use of any eyepiece. Simply put the Barlow lens between the focusing mechanism and the eyepiece for
reflector style telescopes, or the focusing mechanism and the diagonal mirror on refractor style telescopes.
Depending on the specification written on the Barlow lens, these accessories can double or even triple the
magnification of the eyepiece when used with it. Remember, low power is always recommended, but higher
powers are good especially on bigger and brighter objects such as the moon and planets.
Erecting Lens 1.5X (Select Models Only)
This accessory allows the user to view objects on land as you would naturally see them with your unaided eye.
To use this accessory, simply place the erecting lens in between your eyepiece and the focusing mechanism
on your telescope.
DETAILED ASSEMBLY (cONTINUED)
DETAILED ASSEMBLY
8
NEVER LOOK DIRECTLY AT THE SUN
WITH YOUR TELESCOPE
PERMANENT DAMAGE TO YOUR EYES
MAY OCCUR
FOCUSING THE TELESCOPE
1. After selecting the desired Eyepiece, aim Main Telescope Tube at a land-based target at least 200 yards
away (e.g. A telephone pole or building). Fully extend focusing tube by turning Rack and Pinion Focusing
Mechanism.
2. While looking through selected Eyepiece, slowly retract focusing tube by turning Rack and Pinion Focusing
Mechanism until object comes into focus.
ALIGNING THE FINDERSCOPE
1. Look through Main Telescope Tube and establish a well-defined target. (see focusing telescope section).
2. Looking through finderscope, alternate tightening each Finderscope Adjustment Screw until center of
finderscope is precisely centered on the same object already centered in main telescope tube’s field of view.
3. Now, objects located first with the Finderscope will also be centered in the field of view of the Main
Telescope Tube.
BATTERY INSTALLATION
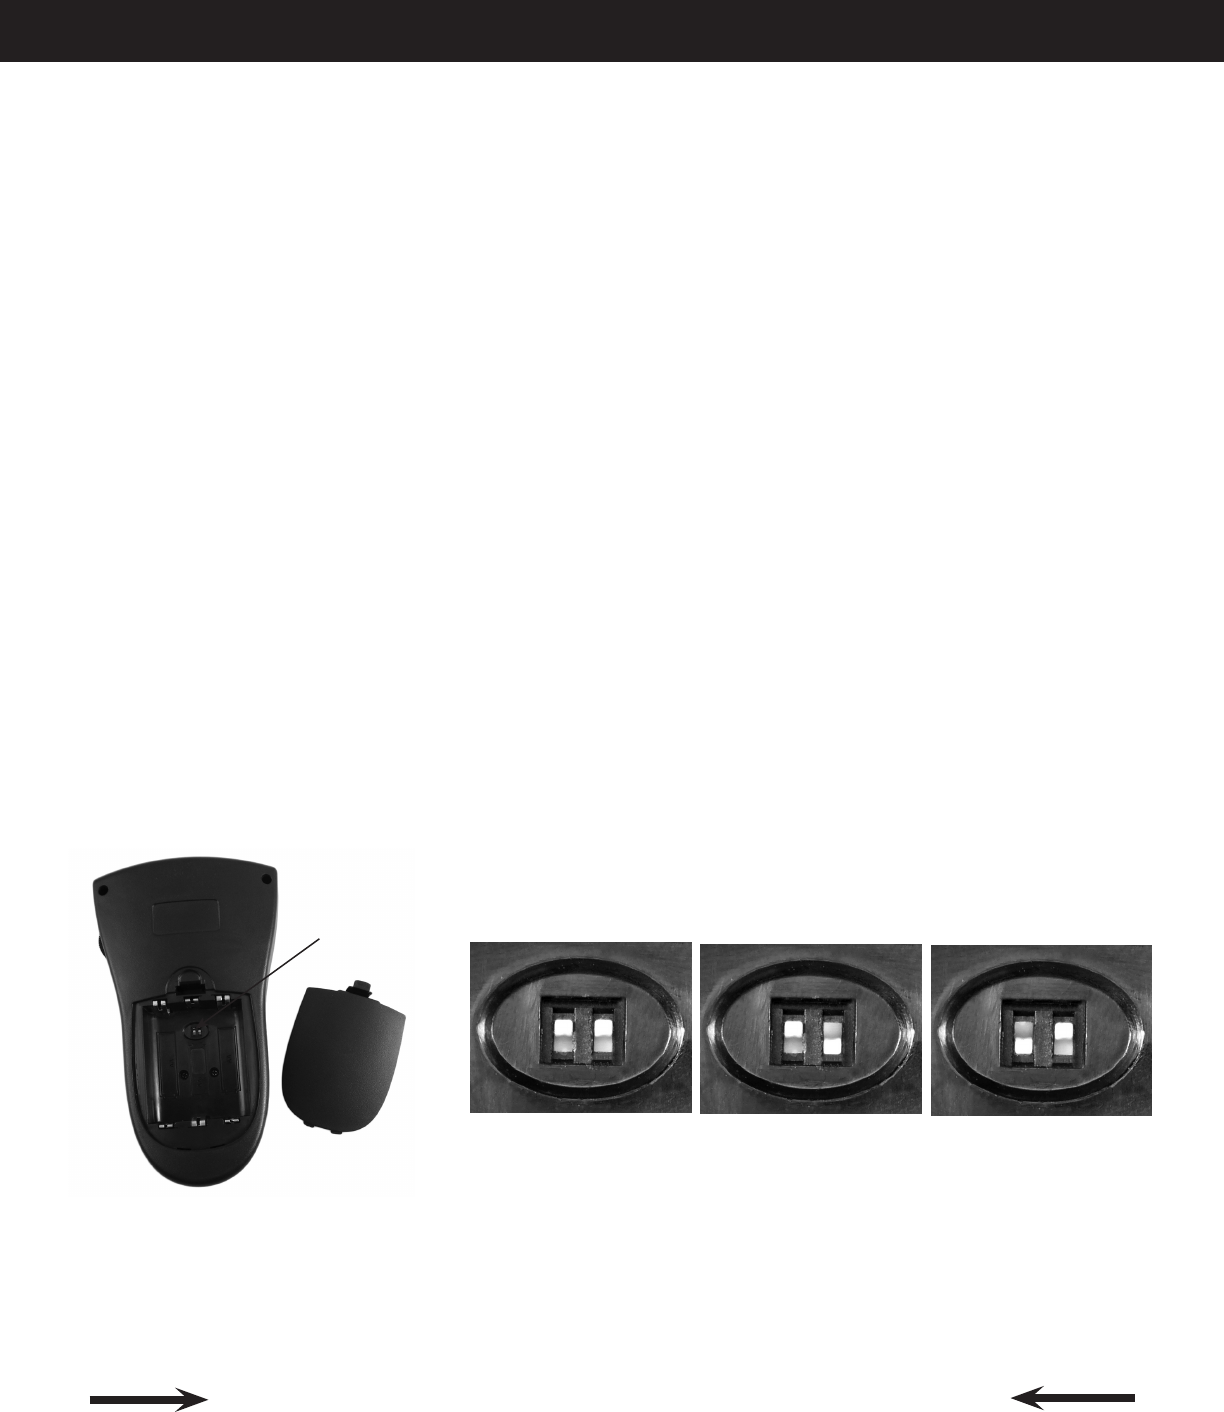
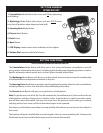
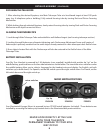
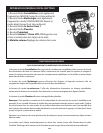
Your Sky Tour Handset is powered by 3 AA batteries (user supplied), installed with positive tip "up" on the
middle battery, positive down on the two side batteries as shown below. The two white micro-switches under
the middle battery allow you to select a language for the handset voice and display. For English, set both
switches up (or both down). For Spanish, set the left switch up and the right switch down. For French, set the
left switch down and the right switch up.
Your Illuminated Voyager Mount is powered by two CR1620 watch batteries (included). These batteries are
installed by removing the battery cap located next to the illuminated dial power switches.
DETAILED ASSEMBLY (cONTINUED)
micro switches
Up Up
Up Down Down Up
ENGLISH
SPANISH FRENCH
+
+
+
MICRO SWITCH POSITIONS
9
BASIC OPERATION / ABOUT LATITUDE/LONGITUDE COORDINATES
INITIAL SETUP AND BASIC OPERATION
SETUP
Set up your assembled telescope on a stable level surface. Your back yard is preferred to your back deck. 1.
Turn on the altitude and azimuth dial light switches to illuminate your telescope mount.2.
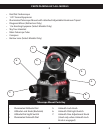
Refer to the direction indicated by "0" on the included compass to align your telescope properly (Zero 3.
degrees=North). To orient your telescope to the same "0" reference, follow these steps (refer to the
"Telescope Mount Parts Key" on the parts illustration page) :
Find the black arrow index mark, located just below the azimuth dial on the mount.•
Move the tripod (or entire telescope) until this arrow index mark is aimed in the direction indicated •
by "0" on the compass.
Loosen the azimuth lock knob and rotate the telescope tube until it is lined up in the same direction •
as the arrow index mark (and "0" on the compass). On refractor style telescopes, the large objective
lens should be pointed in the same direction as the arrow index mark. On reector style telescopes,
the "open" end of the telescope tube should be pointed in this direction.
Finally, with the azimuth lock knob still loosened, rotate the illuminated azimuth dial so that "0" on •
the dial is lined up with the arrow index mark, telescope tube, and "0" compass heading.
Make sure batteries are inserted in the Sky Tour handset and the language is set to your preference (see 4.
"Battery Installation" on the previous page). Push and hold the “Constellation” mode button until the
display comes on. Be sure the volume dial on the right side of the handset is turned up so the voice can
be easily understood. The voice and display will guide you through the setup process, as you make your
settings using the Arrow keys (Next/Back).
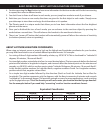
You will rst set the year, month and date. Once you’ve nished making the setting for the year, simply 5.
wait for a few seconds. The handset will automatically accept your setting and prompt you to make the
next setting. Finally, set the correct latitude and longitude for your location. To nd these, check a map of
your area or visit the "Telescopes" page on the Bushnell website (www.bushnell.com), enter your address
(street #, city and state) in the "Find Your Latitude and Longitude" box and click "Get Coordinates". If you
are uncertain about how to enter your location on the handset as a latitude and longitude, see "About
Latitude/Longitude Coordinates" on the next page.
Once the setup is complete, the handset will conrm that your settings are saved. The handset will retain 6.
that information until the batteries are replaced. If you want to use your telescope in a dierent location
at a later date, and therefore need to change the latitude/longitude, time, or other settings, see " Re-
Initialization" in the Troubleshooting section.
BASIC OPERATION
After (A) completing the setup as described above, or (B) turning on the handset the next time you're ready to
use the telescope (by holding the Constellation mode button):
The handset will speak the current time and date, then the four tour mode buttons (Constellation, 1.
Mythology, Amazing Facts, and Planets) will ash. Choose your desired mode of operation by pressing the
corresponding button: Constellations, Mythology, Amazing Facts, or Planets. The tour for that mode will
start, with the voice and display informing and guiding you.
The Sky Tour handset will provide an altitude number (this corresponds to the top dial) and an azimuth 2.
number (this corresponds to the bottom dial) for the rst tour object. These coordinates will be both
spoken and displayed on the LCD. Don’t worry if you miss the numbers, you can repeat them by pressing
the Back button.
Move the telescope in altitude and azimuth to the corresponding numbers on the dials and the telescope 3.
will be pointed at your tour object!
null
  • Add more products to collection
  • Add more products to collection
  • Add more products to collection
  • Add more products to collection
  • Add more products to collection
  • Add more products to collection
  • Add more products to collection
-

Find a Product