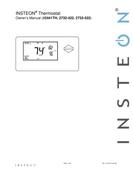

0
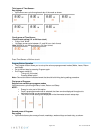
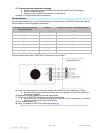
Owner's of the INSTEON Thermostat INSTEON Thermostat gave it a score of 0 out of 5. Here's how the scores stacked up:

Page 13 of 28 Rev: 1/21/2014 8:35 AM
Test Operation
Heating Mode Test
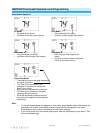
1) Press Mode once to enter Heat mode.
2) Tap the Up arrow several times until setpoint is 2° above current temperature.
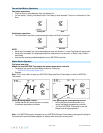
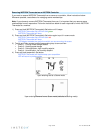
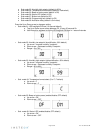
INSTEON Thermostat will call for heat and “Heat” segment will change to “Heating.”
“Heating” segment will flash for 3 seconds, then remain steady when active.
Status LED will display red if enabled (off by default).
Allow furnace to operate long enough to begin blowing warm air.
3) Tap the Up or Down arrows until you reach a desirable heat temperature setpoint (if this is below
ambient, Heating will go inactive).
Note: Fan stays controlled by HVAC and may continue running for a couple minutes.INSTEON
Thermostat has a default 5-minute delay between Heat and Cool settings.
Cooling Mode Test
1) Tap Mode button again to enter Cool mode.
2) Tap the Down arrow several times until setpoint is 2° below current temperature.
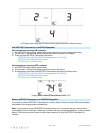
INSTEON Thermostat will call for cooling and “Cool” segment will change to “Cooling.”
“Cooling” segment will flash for 3 seconds, then remain steady when active.
Status LED will display green.
Allow A/C to operate long enough to begin blowing cool air.
3) Tap the Up or Down arrows until you reach a desirable cool temperature setpoint (if above ambient,
Cooling will go inactive).
Note: Fan will turn on and off with Cooling.
Auto Mode Test
1) Tap Mode once to enter Auto mode.
2) Note that your Heat and Cool setpoints are both as set in previous steps, unless you did not have a
minimum 2° gap between settings.
3) Tap Up arrow once to increase both Heat and Cool setpoints by 1°.
4) Tap Down arrow once to decrease both Heat and Cool setpoints by 1°.
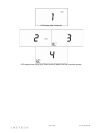
5) Tap Mode once to enter Time of Day mode.
Indicated by Auto at bottom and relevant time of day (Wake, Leave, Return, Sleep) to right of
Heat/Cool set temps.
6) Tap Mode once more to return to Off mode.
Adding an INSTEON Wireless Thermostat
INSTEON Thermostat can synchronize with a INSTEON Wireless Thermostat to provide a portable
thermostat wherever you want temperature control. You can add up to two INSTEON Wireless
Thermostats.
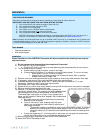
1) Press and hold Set button on INSTEON Wireless Thermostat.
INSTEON Wireless Thermostat Set LED will blink green and unit will beep.
2) Press and hold INSTEON Thermostat Set button.
INSTEON Thermostat will beep, then double-beep.
INSTEON Wireless Thermostat will double-beep.
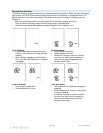
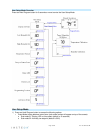
3) Test the scene by pressing and holding the Master button on the INSTEON Thermostat.
• When properly added, pressing the Master button on the INSTEON Thermostat will illuminate the
“Master” segment on that same screen. Additionally, the present room temperature of the
INSTEON Wireless Thermostat will be displayed in position 1 as the small temperature segments
at top center of the display.
• A visual inspection of each display will reveal the Master status of each INSTEON Thermostat or
Zone Thermostat.
Note: Only the INSTEON Thermostat is directly connected to the HVAC system via wires. If you plan on
operating multiple INSTEON Wireless Thermostats you must have at least one INSTEON Thermostat to
control the HVAC.


Find Your Products By Category
- Lawn and Garden
- Household Appliance
- Car Audio and Video
- Computer Equipment
- TV and Video
- Photography
- Home Audio
- Portable Media
- Automotive
- Musical Instruments & Equipment
- Communications
- Personal Care
- Marine Equipment
- Kitchen Appliance
- Baby
- Cell Phone
- Power Tools
- Video Game
- Fitness & Sports
- Laundry Appliance
- Outdoor Cooking
Please Login
